Power Platform Data Migration as Code
I’m sure that wherever you are in your software engineering journey, you have already heard or done something-as-code.
History
The “as code” movement began gaining traction in the early 2010s, particularly with the rise of DevOps and cloud computing. The concept builds on software-defined everything (SDx) principles, where traditionally manual or graphical interface-driven tasks are instead defined and managed through machine-readable code.
One of the earliest and most influential as-code movements was Infrastructure as Code (IaC). Tools like Puppet (2005), Chef (2009), Ansible (2012), and Terraform (2014) allowed infrastructure provisioning using code. Cloud providers like AWS (with CloudFormation in 2011) and Microsoft (with Azure Resource Manager in 2014) followed suit. Configuration as Code (CaC) popped up around early 2010s I believe. Later on we saw Security as Code SaC around 2015-2018 which emerged together with DevSecOps along with tools like Open Policy Agent, HashiCorp Sentinel and AWS Config that enabled security policies as code. In 2018 we even saw Network as Code (NaC) inspired by Software-Defined Networking (SDN). In 2020s we saw many more as-code like Platform as Code to automate platform engineering (e.g. Crossplane and Pulumi), Observability as Code (e.g. Prometheus, Grafana, Terraform for monitoring setup) and finally Data as Code. In the latter the focus is to do data transformations and analytics pipelines as code.
Merit
But why is this paradigm so popular? Let go through a number of factors that makes this paradigm more viable that others.
- Version Control & Change Management - Everything is stored in Git, allowing rollback, history tracking, and collaboration.
- Automation & Consistency - Code based approaches generally reduce human errors compared other alternatives and ensure repeatability.
- Scalability - Coded data migration can easily scales across multiple environments and cloud providers.
- Faster Deployment & Delivery - CI/CD pipelines speed up software development lifecycles.
- Security & Compliance - code can be easily audited either by human or through automation. It's also a lot easier to scan code for security vulnerabilities.
- Disaster Recovery & Rollback - Since the entire setup is code, recovery is just a redeployment away.
- Cost Efficiency - You can rely on mature, feature-rich editors or IDEs like VS Code, Eclipse, Visual Studio and many others for build, test and debugging. Productivity features they provide help you focus on the main tasks rather than grabbing with UX nuances of visual tools.
Setup
Power Platform offers two viable integration point for code-based migrations.
- Web API - which is a RESTfull endpoint built on top of Data v4.0 and all the other tooling generally rely on it to interact with Power Platform.
- Client SDK - which comes in form of NuGet packages that you can use in your .NET applications / services.
The SDK looks like the way to go at first sight, but it has its quirks too. For example it dictates certain way of working with the API and out of the serialization / deserialization has room for improvement. The SDK relies on certain versions of several other common NuGets that can soon become a maintenance burden when you need different versions of those same NuGets. The good news is the Web API is well designed, very mature, well documented and easy to work with.
As for the language you can pretty much use any language that you are comfortable with, but I'm going to focus on PowerShell, because it's a language built from the ground up for automation and you will soon see how brief and easy our data flows turn up. You don't really need to be a professional PowerShell developer to use it. In fact I think you can learn it in under an hour. If it's not your choice of language, don't worry, what I'm about to show you will be easy to follow and the concepts still apply to any high level language.
I will start with a basic implementation (i.e. Version 1) and we will revisit our implementation in each blog post to finally arrive at a robust data migration script that you can use in your real-world projects. At the end, I will publish the result in GitHub to make it easily accessible to everyone.
Version 1
To start simple, let's assume we have a CSV file that contains a list of accounts that we would like to import. This could be an export from Salesforce or any other software. A simple transformation and load would look like the following.
Import-Module PSDataverse
Connect-Dataverse https://test.crm4.dynamics.com
Import-Csv ./accounts.csv |
  ForEach-Object {
    @{
      Uri = "accounts(my_migrationid=" + $_.accountid + ")"
      Method = "PATCH"
      Value = @{
        name = $_.Name
        address1_country = $_.Country
        address1_city = $_.City
        address1_line1 = $_.Line1
        address1_line2 = $_.Line2
        address1_postalcode = $_.PostCode
      }
    }
  } |
  Send-DataverseOperation -BatchCapacity 100 -MaxDop 10
Let's go over the script together. The first line, imports PSDataverse module which we use for interactions with Web API of Power Platform. It does all the heavy lifting so that we can focus on the important logic.
The second line connects to a Power Platform environment using integrated authentication. The Connect-Dataverse command supports many different kinds of authentication and even on-premises Dynamics installations.
The rest of the script is essentially a single line, but broken down into multiple lines for clarity. If you skim through it, you will notice multiple commands "piped" together using the pipe character. The first one Import-Csv just imports a CSV file, the next one iterates through the lines (which are essentially objects with properties) and creates a new object with a specific structure that the next command expects, and finally the last command Send-DataverseOperation sends the them as requests to Web API. Your data flow is mainly about converting the data to requests for Web API. In this case a PATH to create accounts with alternate key my_migrationid, a name and some address fields. Alternate key together with the PATH method, make your dataflow repeatable and safe. In other words if you repeat the dataflow, it will simple update those accounts instead of creating new ones.
If you look more closely to the last command, you will notice that we are asking to send maximum 10 requests in parallel using -MaxDop which sets the maximum degree of parallelism. We also ask to send 100 account in each request using -BatchCapacity parameter. This combination can greatly improve the performance of our dataflow. You always need to play with these two parameter to find the best combination.
Let's improve our dataflow to display at the end, how long the execution took, so each time we try a different combination of the two parameters MaxDop and BatchCapacity. We can easily measure the execution of any piece of script using Measure-Command . This will make our script like the following.
Import-Module PSDataverse
Connect-Dataverse https://test.crm4.dynamics.com
Measure-Object {
  Import-Csv ./accounts.csv |
    ForEach-Object {
      @{
        Uri = "accounts(my_migrationid=" + $_.accountid + ")"
        Method = "PATCH"
        Value = @{
          name = $_.Name
          address1_country = $_.Country
          address1_city = $_.City
          address1_line1 = $_.Line1
          address1_line2 = $_.Line2
          address1_postalcode = $_.PostCode
        }
      }
    } |
    Send-DataverseOperation -BatchCapacity 100 -MaxDop 10
  }
Measure-Object returns a Timestamp and by default it will be displayed like following, which is fine, but I prefer to format it into a short, human friendlier format.
Days              : 0
Hours             : 0
Minutes           : 0
Seconds           : 10
Milliseconds      : 27
Ticks             : 100279756
TotalDays         : 0.000116064532407407
TotalHours        : 0.00278554877777778
TotalMinutes      : 0.167132926666667
TotalSeconds      : 10.0279756
TotalMilliseconds : 10027.9756
For this formatting, we can write our own function which I will reuse in my upcoming blog posts when we take our migration to the next level.
function Format-TimeSpan {
    Param(
      [CmdletBinding()]
      [Parameter(Mandatory=$true, Position=0, ValueFromPipeline=$true)]
      [ValidateNotNullOrEmpty()]
      $measurement
    )
    $message = "Completed in"
    if ($measurement.Days -gt 0) { $message += " $($measurement.Days) days" }
    if ($measurement.Hours -gt 0) { $message += " $($measurement.Hours) hours" }
    if ($measurement.Minutes -gt 0) { $message += " $($measurement.Minutes) minutes" }
    if ($measurement.Seconds -gt 0) { $message += " $($measurement.Seconds) seconds" }
    if ($measurement.Milliseconds -gt 0) { $message += " $($measurement.Milliseconds) milliseconds" }
    if ($message.Length -gt 12) { $message }
}
Now let's pipe the output of Measure-Command to our Format-TimeSpan in the dataflow.
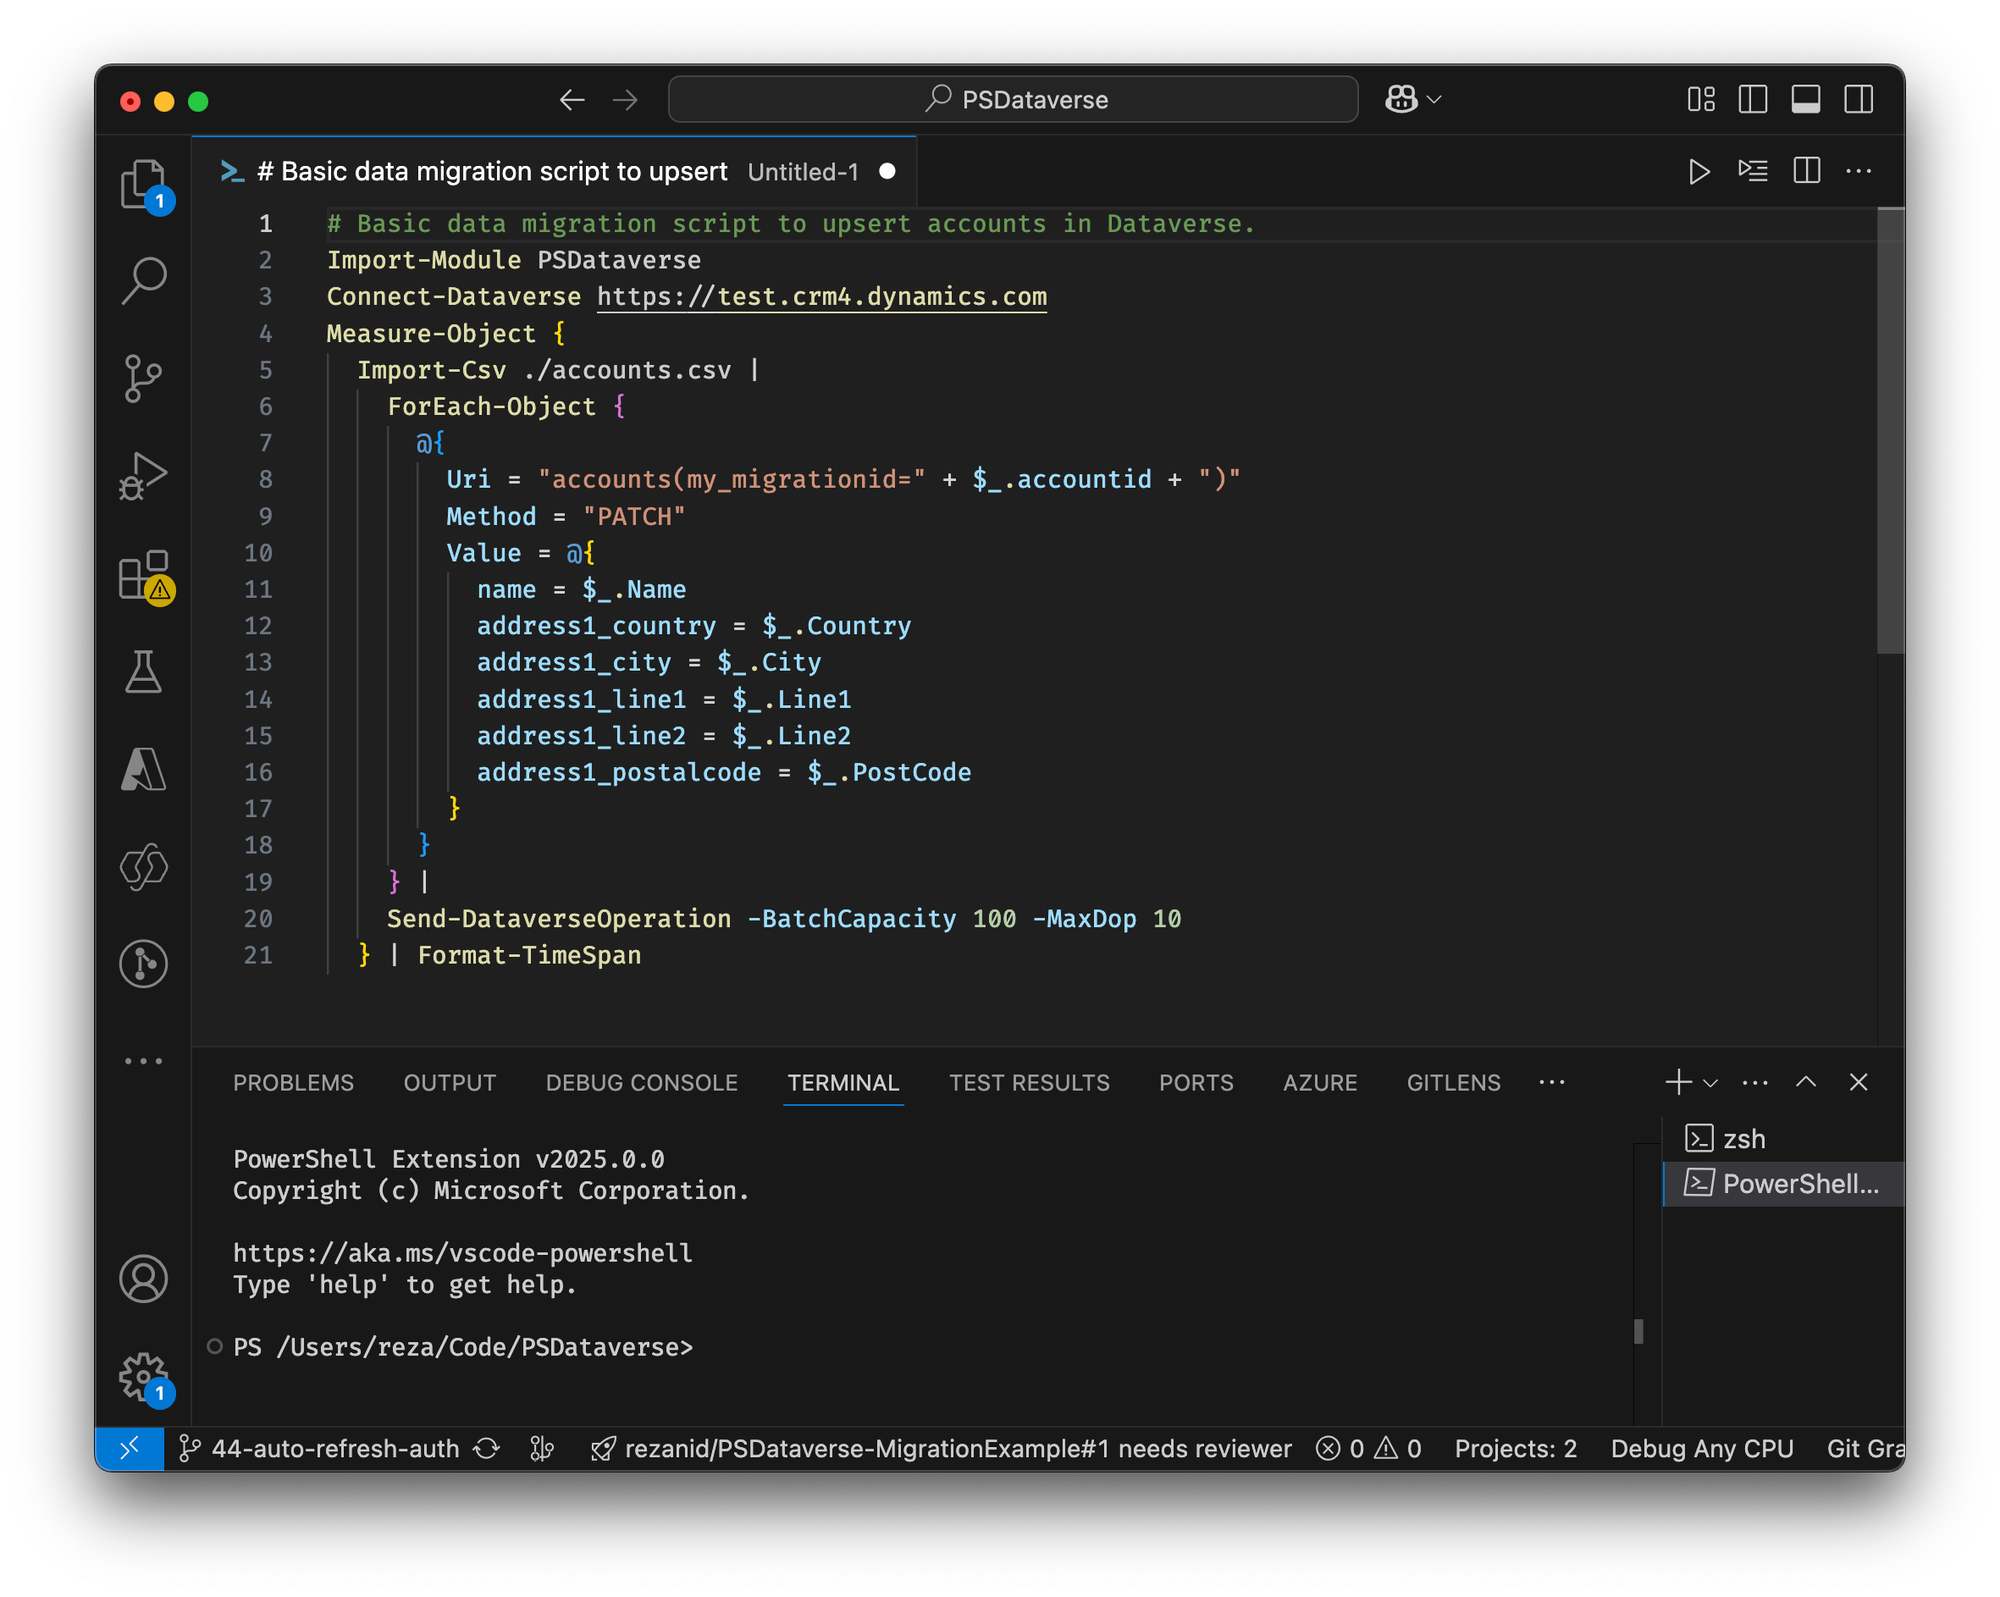
Import-Module PSDataverse
Connect-Dataverse https://test.crm4.dynamics.com
Measure-Object {
  Import-Csv ./accounts.csv |
    ForEach-Object {
      @{
        Uri = "accounts(my_migrationid=" + $_.accountid + ")"
        Method = "PATCH"
        Value = @{
          name = $_.Name
          address1_country = $_.Country
          address1_city = $_.City
          address1_line1 = $_.Line1
          address1_line2 = $_.Line2
          address1_postalcode = $_.PostCode
        }
      }
    } |
    Send-DataverseOperation -BatchCapacity 100 -MaxDop 10
  } | Format-TimeSpan
If the dataflow takes 10 minutes and 5 seconds to complete you will see a result like the following. Don't hesitate to change the function to your liking.
Completed in 10 minutes, 5 seconds, 2 milliseconds